Soldering plastic to plastic using a gas torch is a practical skill that can be incredibly useful in various DIY projects, repairs, and industrial applications. As a gas torch supplier, I’ve seen firsthand how the right equipment and technique can make all the difference in achieving a strong and reliable plastic bond. In this blog, I’ll share my insights on how to use a gas torch for soldering plastic to plastic effectively. Gas Torch

Understanding the Basics of Plastic Soldering
Before diving into the process, it’s essential to understand the fundamentals of plastic soldering. Unlike metal soldering, which involves melting a filler metal to join two pieces, plastic soldering relies on melting the plastic itself to create a bond. This process requires a careful balance of heat and pressure to ensure a strong and durable joint.
Choosing the Right Plastic and Gas Torch
Not all plastics are suitable for soldering. Some plastics, such as PVC, ABS, and polycarbonate, are more amenable to the soldering process than others. When selecting a plastic for soldering, consider its melting point, chemical composition, and compatibility with the gas torch.
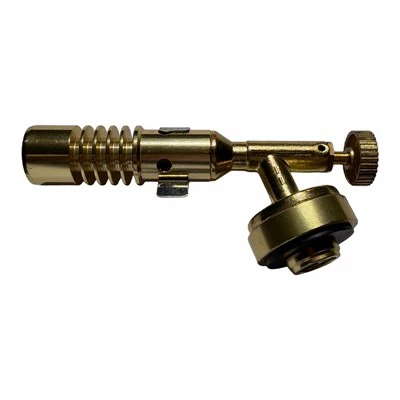
As a gas torch supplier, I recommend choosing a torch that offers precise heat control and a consistent flame. Look for a torch with adjustable flame settings and a fine tip for more accurate soldering. Additionally, make sure to use a high-quality gas fuel, such as propane or butane, to ensure a clean and efficient burn.
Preparing the Plastic Surfaces
Proper surface preparation is crucial for a successful plastic soldering job. Start by cleaning the plastic surfaces to remove any dirt, grease, or debris. You can use a mild detergent and water to clean the surfaces, followed by a thorough rinse and dry.
Next, roughen the surfaces slightly to improve the adhesion of the molten plastic. You can use sandpaper or a file to create a rough texture on the surfaces. This will help the molten plastic to bond more effectively with the plastic substrate.
Setting Up the Gas Torch
Once you’ve prepared the plastic surfaces, it’s time to set up the gas torch. Start by attaching the gas cylinder to the torch according to the manufacturer’s instructions. Make sure the connection is secure and there are no leaks.
Next, adjust the flame settings on the torch to achieve the desired heat output. For plastic soldering, a medium to low flame is usually sufficient. You can test the flame by holding a piece of scrap plastic near the flame to see how it responds.
Soldering the Plastic
Now that the gas torch is set up and the plastic surfaces are prepared, it’s time to start soldering. Hold the gas torch at a slight angle and direct the flame towards the plastic surfaces. Move the torch back and forth slowly to evenly heat the plastic.
As the plastic begins to melt, apply gentle pressure to the joint using a soldering iron or a pair of pliers. This will help to spread the molten plastic and create a strong bond. Be careful not to apply too much pressure, as this can cause the plastic to deform or crack.
Continue heating and applying pressure until the plastic has fully melted and the joint is secure. You can then remove the heat and allow the plastic to cool and solidify.
Tips for Successful Plastic Soldering
- Use the right technique: When soldering plastic, it’s important to use a smooth and consistent motion. Avoid applying too much heat or pressure, as this can cause the plastic to overheat or deform.
- Choose the right filler rod: If you’re using a filler rod to strengthen the joint, make sure it’s made of the same type of plastic as the substrate. This will ensure a strong and durable bond.
- Work in a well-ventilated area: Plastic soldering can produce fumes and vapors that can be harmful if inhaled. Make sure to work in a well-ventilated area or use a respirator to protect yourself.
- Practice on scrap plastic: Before attempting to solder a real project, practice on a piece of scrap plastic to get a feel for the process and to perfect your technique.
Troubleshooting Common Problems
- Overheating: If the plastic is overheating, reduce the heat output of the gas torch and move the torch more quickly over the surface.
- Poor adhesion: If the plastic is not bonding properly, make sure the surfaces are clean and roughened. You may also need to increase the heat or pressure to ensure a strong bond.
- Cracking or warping: If the plastic is cracking or warping, reduce the heat output of the gas torch and apply less pressure. You may also need to use a lower melting point plastic or a different soldering technique.
Conclusion
Butane Gas Torch Soldering plastic to plastic using a gas torch is a valuable skill that can be used in a variety of applications. By following the tips and techniques outlined in this blog, you can achieve a strong and reliable plastic bond. As a gas torch supplier, I’m here to help you find the right equipment and provide you with the support you need to succeed. If you have any questions or need further assistance, please don’t hesitate to contact me. I look forward to working with you and helping you achieve your soldering goals.
References
- "Plastic Welding: A Comprehensive Guide." Plastics Technology, [publication date].
- "How to Solder Plastic." DIY Network, [publication date].
- "Gas Torch Safety Guidelines." National Fire Protection Association, [publication date].
Yuhuan Shunshida Intelligent Electromechanical Co., Ltd.
As one of the most professional spray gun manufacturers and suppliers in China, we’re featured by quality products and good service. Please rest assured to buy durable spray gun at low price from our factory. We also accept customized orders.
Address: No. 186 East Nanxing Road, Chumen Town, Yuhuan City, Zhejiang Province
E-mail: yuhuanshunshida@gmail.com
WebSite: https://www.cmssdgastorch.com/