- English
- Español
- Português
- русский
- Français
- 日本語
- Deutsch
- tiếng Việt
- Italiano
- Nederlands
- ภาษาไทย
- Polski
- 한국어
- Svenska
- magyar
- Malay
- বাংলা ভাষার
- Dansk
- Suomi
- हिन्दी
- Pilipino
- Türkçe
- Gaeilge
- العربية
- Indonesia
- Norsk
- تمل
- český
- ελληνικά
- український
- Javanese
- فارسی
- தமிழ்
- తెలుగు
- नेपाली
- Burmese
- български
- ລາວ
- Latine
- Қазақша
- Euskal
- Azərbaycan
- Slovenský jazyk
- Македонски
- Lietuvos
- Eesti Keel
- Română
- Slovenski
- मराठी
- Srpski језик

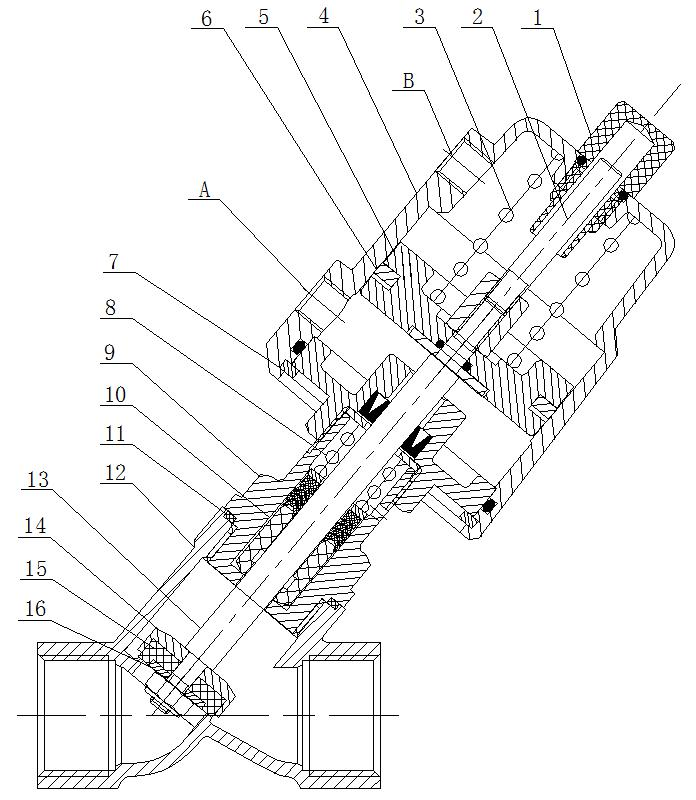
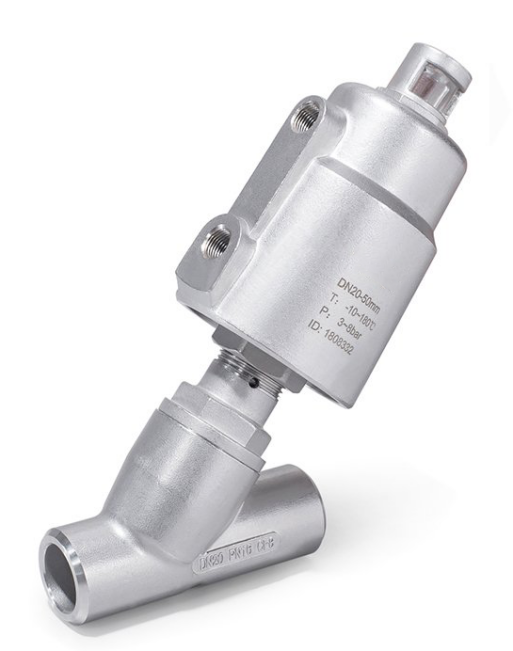
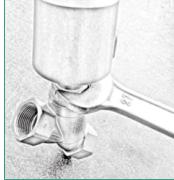
EPS Machine Angle Seat Valve Installation And Disassembly
2022-01-13
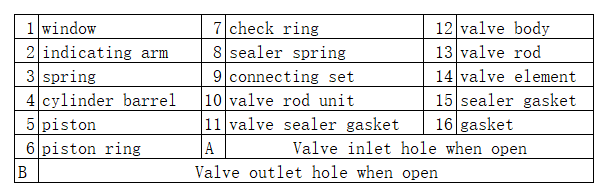
The angle seat valve is an important part of EPS machine,how repair or installation is important.
1. Installation and use
1.1 Please select the direction of valve installation according to specific conditions;
1.2 Before installation, please be sure to clean the pipe, especially the new pipe, must clean welding slag, rust, dust, so as not to damage the valve impurities; Pipelines should be supported firmly and without vibration. When installing heavier valves, additional support is needed to hang or prop up the valves to prevent excessive weight or vibration from having adverse effects on the valves and pipelines.
1.3 Before installing the valve, check the model, parameters, specifications and connection mode on the valve label and ensure that it meets the requirements of field working conditions. At the same time, please check the cylinder, valve body, window, etc., to ensure no external damage;
1.4 When equipped with control air source, please ensure that the air source is dry and clean, and the capacity and pressure are enough;
1.5 Before installing the valve, please close the pipeline and remove the pressure. Be careful of the high pressure in the pipeline or the harm of dangerous media;
1.6 In the installation of flange valves, the installation of both ends of the flange, must be angular tightening, and in the diagonal tightening unilateral bolt rotation should be controlled within one circle, not a unilateral tightening, resulting in tilting force, affecting the use;
1.7 When installing the valve in the form of welding, the actuator must be removed from the valve first, and then the valve is welded on the pipeline;
1.8 Take care to protect the removed valve body gasket, valve core gasket and connecting screw grain to prevent bumping and adhesion of dirt and impurities
2. Valve disassembly and maintenance
2.1 Removing the Valve
2.1.1 Before the valve is disassembled, the high-pressure fluid in the valve must be emptied and the medium pressure in the valve must be drained. If the medium is high temperature, flammable, toxic or corrosive, it must be thoroughly removed to prevent accidental injury to the human body and equipment;
2.1.2 Removing the valve body: in this state, the valve body must be restored to normal temperature, and the valve body must be fixed. The compressed air shall be entered through the air inlet hole at the lower part of the cylinder, and the valve door shall be opened, and the six sides of the joint shall be tightened with the wrench of the corresponding size, and the valve body shall be removed by rotating the thread in the clockwise direction. Note: The disassembled parts shall protect the sealing surfaces to prevent bumping, and record the reassembly; Parts to protect the sealing surface, to prevent bumping, and do a good record back;
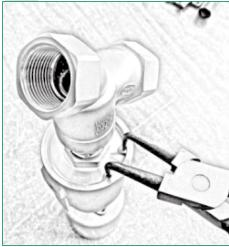
2.1.3 Cylinder removal: Due to the large force of the spring, when the clamping cylinder cylinder and end cover clamping spring is removed, the spool and valve stem parts should be pressed by special clamping equipment before the clamping spring pliers can be used to slowly take out the clamping spring, and then loosen the clamping equipment upward and lift out the remaining parts. Note: 1) After the spring is taken out, the pressure of the pressing equipment should be slowly removed to prevent the stronger spring from popping up the parts, causing danger and damage, and make a record of reloading; 2) 101 series Angle valve cylinder is not recommended to be removed, if 11
Please contact your ESG sales representative for any problems with cylinders.
2.1.4 Disassembly of seals: When disassembly of seals, sharp tools shall not be used for disassembly, and the sealing surface of the disassembled seals and their carriers shall be well protected to prevent collision or loss of accessories, and the reassembly record shall be made;
2.1.5 Removing manual Angle seat valve sequence: remove the valve body, remove the hand wheel pin, remove the hand wheel, screw down the pressing nut, and finally disassemble the spool, stem and seals.
2.2 Reinstall the valve
2.2.1 Reassembly seals: The disassembled valves should be dealt with corresponding problems. After treatment, they should be installed in sequence according to the disassembly and reassembly records. Note: The sealing parts must be installed in place when installing, and there is no distortion of the rubber ring. Before installing the sealing ring, the lubricating oil should be evenly coated in the groove of the installation part, and then the sealing ring should be installed and the outer surface of the sealing ring should be coated with lubricating oil again. Reasonable and effective lube oil is the premise to ensure the normal and effective use of valve;
2.2.2 Reloading the cylinder: After the assembly of replacement parts is completed, slowly import the piston and end cover into the cylinder, and then install the spring in place to complete the assembly of the cylinder;
2.2.2.1 When the piston and end cover are introduced, the cylinder should be slowly introduced after being righted, otherwise the piston ring and sealing ring will be torn due to deflection, affecting the sealing;
2.2.2.2 After clamping the spring into the groove, check whether the spring is 100% completely jammed into the spring groove of the cylinder, and release the pressing equipment after checking that the spring is completely jammed into the cylinder, and then conduct the sealing inspection of the cylinder;
2.2.3 Reloading the valve body: after the inspection is qualified, compress air through the air inlet hole of the cylinder, lift the piston up, put the valve body sealing pad, and apply anti-stuck agent at the screw grain, and then screw the valve body into tighten, and then carry out the valve body inspection after completion.
2.3 Reloading valve testing
2.3.1 The repaired valve shall be installed in the pipeline again after offline pressure test and no abnormality occurs;
2.3.2 Valve body sealing inspection: including valve core sealing gasket inspection, valve body sealing gasket inspection and connecting hole inspection;
2.3.2.1 The compressed air of the required pressure can be passed into the valve according to the working condition, and the whole valve body and the connection can be sunk into the water, and the pressure can be held for 30 seconds to observe whether there is leakage. If there is no bubble, it is qualified, otherwise it needs to be repaired again;
2.3.3 Cylinder seal inspection: including window seal inspection, end cover O-ring inspection and piston ring sealing inspection;
2.3.3.1 7bar compressed air can be passed through the air inlet hole at the lower part of the cylinder, and the whole cylinder and the end cap can be sunk into the water, and the pressure is held for 30 seconds to observe whether there is leakage. If there is no bubble, it is qualified, otherwise it needs to be repaired again.
